I wanted to acknowledge that I have been a bad, bad blogger. Work and life have gotten in the way of documenting my progress here (though I have been keeping up on Instagram). C'est la vie.
For most of my crafting life, I've been a a selfish crafter. Not everyone I know is craft-worthy! So part of this year's list is to make stuff for other people. I've realized I enjoy the process almost as much as the finished object (occasionally more!), so this should be an interesting experiment for myself.
Project 03/52 is the simple snug hat by Sarah Hatton. It took very little time to make - I want to say an hour, but I can't remember now! For sure I started and finished the same day. Very straight-forward knit (would be great for a beginner who wanted to learn decreases) and only takes one skein of Rowan Big Wool (or comparable chunky yarn). It's knit flat and then a seam is sewn up the back. I like that construction, but if you don't, you should easily be able to convert to knitting it in the round. I'm not a huge fan of pink, but know someone who is and thought she would enjoy it. I made it in January and still haven't had a chance to give it to her, but I'll report back after I do.
Saturday, February 27, 2016
Wednesday, January 13, 2016
02/52 - St. Germain beanie
A couple years ago, Anthropologie had a hat on their site called the St. Germain beanie. I immediately fell in love with the style - a spiral design with beads - and decided to recreate it using Paton's classic roving in a sunshine yellow (minus the beads - I'm not really a bling kinda gal). I love that thing! At the time, I wrote up some notes with the idea to publish a pattern and then got busy with life and let it sit. Cut to now and I decided to do just that. I bought another skein of Paton's classic roving and test knit my notes (and recreated part where I just figured I would remember what I did - oy, when will I learn?).
So, project 02 of 52 is the test knit of a pattern I'll be publishing on ravelry soon! My friend, Sandra, was the first to say she wanted it when I posted a pic on Facebook, so the sample will be hers (or she can pic any color she likes and I'll knit her one because she's knit-worthy like that).
Here's a pic of the latest version (there are two lengths - one is skull cap length and this one is floppy beanie):
So, project 02 of 52 is the test knit of a pattern I'll be publishing on ravelry soon! My friend, Sandra, was the first to say she wanted it when I posted a pic on Facebook, so the sample will be hers (or she can pic any color she likes and I'll knit her one because she's knit-worthy like that).
Here's a pic of the latest version (there are two lengths - one is skull cap length and this one is floppy beanie):
01/52 - Noro Cardigan (Design 16)
I finished the first two projects on my list last weekend and have only just had a chance to sit down and blog about them.
The first project of the year was Design 16 from Noro Collection #3 by Jenny Watson . I used Noro Kureyon sock in shade 220. I'm a fan of Noro and their colorways, but the Kureyon sock was rustic feeling (which I like) and thick and thin. I happen to love that about their yarn, but others prefer to knit with something softer. I was able to match the fronts and the sleeves, but it wasn't easy. A couple of my skeins had knots where the colors would make a sudden change and I had to get creative to keep things matched. Pretty irritating for a yarn that isn't cheap.
No matter, for all the stockinette and ribbing on teeny tiny needles, I love the end result. It will, however, be awhile before I knit a sweater with such small needles again (in fact, I may have something going on size 15s as a palate cleanser).
Here is the finished product - I just need to pick out the buttons and sew them on before I wear it.
I have plans to make a Burda a-line skirt in denim to go with it. I think it will be very Boden-esque!
The first project of the year was Design 16 from Noro Collection #3 by Jenny Watson . I used Noro Kureyon sock in shade 220. I'm a fan of Noro and their colorways, but the Kureyon sock was rustic feeling (which I like) and thick and thin. I happen to love that about their yarn, but others prefer to knit with something softer. I was able to match the fronts and the sleeves, but it wasn't easy. A couple of my skeins had knots where the colors would make a sudden change and I had to get creative to keep things matched. Pretty irritating for a yarn that isn't cheap.
No matter, for all the stockinette and ribbing on teeny tiny needles, I love the end result. It will, however, be awhile before I knit a sweater with such small needles again (in fact, I may have something going on size 15s as a palate cleanser).
Here is the finished product - I just need to pick out the buttons and sew them on before I wear it.
I have plans to make a Burda a-line skirt in denim to go with it. I think it will be very Boden-esque!
Sunday, January 03, 2016
52 Projects in 52 Weeks - Handmade Wardrobe edition
About a year and a half ago, I challenged myself with a project called, "52 projects in 52 weeks" in order to get over a crafting slump (and finish some UFOs I had laying around at the same time). I ended up completing the projects in nine months (bit of an over-achiever here). At that time, I took some time off from posting daily outfits and FOs on Instagram and Facebook because I wanted my next project to be purposeful and a tiny bit planned (enough with the fly-by-the-seat-of-my-pants crafting!), which brings us to the beginning of 2016 and the idea I had for my next project: 52 projects in 52 weeks - handmade wardrobe edition.
The idea is just as simple as it sounds: I am going to make 52 projects over the course of the next 52 weeks (aka all of 2016) that will be incorporated into my wardrobe (I might throw a few pieces in for my boyfriend because he's pretty awesome and craft-worthy).
Some backstory: a lot of my wardrobe is already handmade by me, so this isn't some unattainable idea I have (where would be the fun in that?). I always tell people, "Set yourself up to succeed, not to fail." And that is what I am doing here.
The idea for me is to make the things I need in my wardrobe rather than buy them. I've needed a new winter coat for the last 3 years, so that was a natural. I also need a new raincoat. And so on and so on, etc., etc.
Here is a sneak peek at the list I'm putting together. I fully expect this will change organically over the course of the year and after my last challenge, I do not expect to end up keeping everything I make (sometimes the idea of something is better than the reality). Either way, I look forward to the challenge and hope you'll join me on this journey.
The idea is just as simple as it sounds: I am going to make 52 projects over the course of the next 52 weeks (aka all of 2016) that will be incorporated into my wardrobe (I might throw a few pieces in for my boyfriend because he's pretty awesome and craft-worthy).
Some backstory: a lot of my wardrobe is already handmade by me, so this isn't some unattainable idea I have (where would be the fun in that?). I always tell people, "Set yourself up to succeed, not to fail." And that is what I am doing here.
The idea for me is to make the things I need in my wardrobe rather than buy them. I've needed a new winter coat for the last 3 years, so that was a natural. I also need a new raincoat. And so on and so on, etc., etc.
Here is a sneak peek at the list I'm putting together. I fully expect this will change organically over the course of the year and after my last challenge, I do not expect to end up keeping everything I make (sometimes the idea of something is better than the reality). Either way, I look forward to the challenge and hope you'll join me on this journey.
Saturday, October 11, 2014
Easy Peasy Gumdrop Necklace
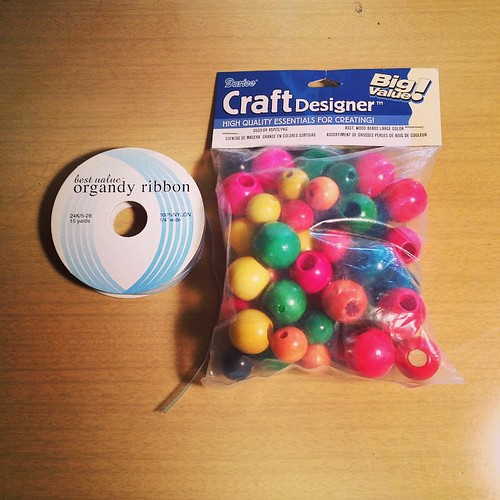
Got a couple minutes to spare? All you need is some organdy ribbon, wooden beads (I went for the colorful ones) and a few minutes.
Cut a length of 45" off the organdy, arrange the beads how you want them (I start in the middle with the biggest and then balance them out with the smallest on the ends). Go until you run out of beads or ribbon, then knot the ends together (trim if necessary) and voila`! Finished necklace.
Saturday, June 21, 2014
Hemlock Tee - a review
It's been nearly a year since Grainline released their free pattern for the Hemlock Tee and I just made my first one. I was so impressed with the pattern that I decided to write a review for it.
Full disclosure: I've made several downloadable patterns from various independent pattern makers and aside from one bit of user error (more on that below), the Hemlock Tee has got to be one of the most well-drafted patterns I have ever made.
I downloaded the pattern here and printed it out on my new printer. I was lazy and didn't print the test sheet first. When I measured the 3" square, it was more like 2.875" square. I nearly chucked it and reprinted (wasteful!). In fact, I did bin the paper and then pulled it right back out when I remembered that the pattern is meant to be over-sized. I figured the worst that happens is it's a touch more fitted, and you know what? It worked out better than I could have hoped for. The end result is a nice slouchy tee shirt that is comfortable and not sloppy.
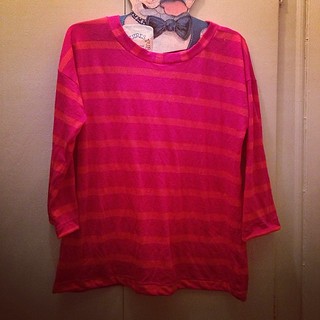
I had some fuchsia and orange striped tissue tee fabric in my stash that I used (again, figuring no great loss if it didn't work). I bought it off fabric.com and it was a lot brighter than expected so it's languished while I was looking for the right project. The fabric was made for this pattern. I matched up the stripes and in a case of serendipity, when my arms are at my sides, the stripes line up beautifully from the body to the sleeves. I couldn't have planned it better.
Now to the pattern itself. There are three main pieces to cut out (back, front and sleeve) and then you draft your own neck band separately. I sewed the shoulders together and then inserted the neckband (twice, I might add, since I initially put it in backwards, le sigh). There is no armhole curve per se, just a notch where the sleeve ends. I wasn't sure how that would go, but everything lined up beautifully. Once I sewed the sleeves to the body, I stitched both side seams/underarms closed and checked the fit. I breathed a sigh of relief at this point. Next, I turned up the hems for the body and sleeves, zig zagged them and that was it! Finished top. I finished it last night and wore it out today. It's comfortable, cute and I will be making more.
Full disclosure: I've made several downloadable patterns from various independent pattern makers and aside from one bit of user error (more on that below), the Hemlock Tee has got to be one of the most well-drafted patterns I have ever made.
I downloaded the pattern here and printed it out on my new printer. I was lazy and didn't print the test sheet first. When I measured the 3" square, it was more like 2.875" square. I nearly chucked it and reprinted (wasteful!). In fact, I did bin the paper and then pulled it right back out when I remembered that the pattern is meant to be over-sized. I figured the worst that happens is it's a touch more fitted, and you know what? It worked out better than I could have hoped for. The end result is a nice slouchy tee shirt that is comfortable and not sloppy.
I had some fuchsia and orange striped tissue tee fabric in my stash that I used (again, figuring no great loss if it didn't work). I bought it off fabric.com and it was a lot brighter than expected so it's languished while I was looking for the right project. The fabric was made for this pattern. I matched up the stripes and in a case of serendipity, when my arms are at my sides, the stripes line up beautifully from the body to the sleeves. I couldn't have planned it better.
Now to the pattern itself. There are three main pieces to cut out (back, front and sleeve) and then you draft your own neck band separately. I sewed the shoulders together and then inserted the neckband (twice, I might add, since I initially put it in backwards, le sigh). There is no armhole curve per se, just a notch where the sleeve ends. I wasn't sure how that would go, but everything lined up beautifully. Once I sewed the sleeves to the body, I stitched both side seams/underarms closed and checked the fit. I breathed a sigh of relief at this point. Next, I turned up the hems for the body and sleeves, zig zagged them and that was it! Finished top. I finished it last night and wore it out today. It's comfortable, cute and I will be making more.
Saturday, February 15, 2014
Spring Has Sprung (Skirt) - 08/52
After finishing the socks, I pulled out a few UFOs. I've made some decent progress on one of them - finishing a pair of sleeves in 4 days. I've now learned the only thing that makes sleeves feel like a fast knit are a pair of socks. I should probably mention the sleeves were knit on size 15 needles, which would help explain their rapid growth over a pair of socks knit on size 0s.
In addition, I went to Gallifrey One yesterday (why yes, I do love Doctor Who, thank you very much) and got in some good knitting time in Hall A. That project is on size 8s, using bamboo tape yarn, and I am feeling the results of that in my shoulder now. Meh. There's a reason that project's been sitting.
Here's a sneaky pick of Arthur Darvill (Rory) I took yesterday:
Finally, I finished project 8 of 52 this evening! Work has been taking up a lot of my time, so I'm happy/relieved to be able to stay on track with this crazy goal of mine. The pattern I used was New Look 6107 and the fabric is the last of some stretch sateen I've had for awhile. I've previously made two blouses out of it, but today I had the bright idea to make a skirt out of it for Spring/Summer. I blame Pinterest for inspiring the idea, as I saw a vintage Anthropologie picture with a dress made from landscape fabric. Anyway, the end result is quite cute and I think it can be dressed up or down. The shape is a classic pencil skirt, and the pattern itself is quite well-drafted (everything went together well). I changed the back vent to a slit and sewed the side seams in 1/2" instead of 5/8" seams (I'm right in between a 12 and 14 and this worked out fine). I'll definitely be making this skirt again. Here's the finished skirt:
And here's Clancy being a good sport while I cut out the skirt (I call this series, "Scraps on my cat"):
In addition, I went to Gallifrey One yesterday (why yes, I do love Doctor Who, thank you very much) and got in some good knitting time in Hall A. That project is on size 8s, using bamboo tape yarn, and I am feeling the results of that in my shoulder now. Meh. There's a reason that project's been sitting.
Here's a sneaky pick of Arthur Darvill (Rory) I took yesterday:
Finally, I finished project 8 of 52 this evening! Work has been taking up a lot of my time, so I'm happy/relieved to be able to stay on track with this crazy goal of mine. The pattern I used was New Look 6107 and the fabric is the last of some stretch sateen I've had for awhile. I've previously made two blouses out of it, but today I had the bright idea to make a skirt out of it for Spring/Summer. I blame Pinterest for inspiring the idea, as I saw a vintage Anthropologie picture with a dress made from landscape fabric. Anyway, the end result is quite cute and I think it can be dressed up or down. The shape is a classic pencil skirt, and the pattern itself is quite well-drafted (everything went together well). I changed the back vent to a slit and sewed the side seams in 1/2" instead of 5/8" seams (I'm right in between a 12 and 14 and this worked out fine). I'll definitely be making this skirt again. Here's the finished skirt:
And here's Clancy being a good sport while I cut out the skirt (I call this series, "Scraps on my cat"):
Saturday, February 08, 2014
Let there be socks!
Sorry I haven't updated the blog with my projects, but I am happy to say I am more or less on track with the 52! Projects so far include, a black and white striped tee (which I need to fix, le sigh), a cardigan (Copine), a hat (my own pattern), a navy and white striped tee, a brown and white linen skirt, a beige linen top, jodphurs and a pair of socks. That's right, I finished a pair of socks! I used the fine sock pattern from Paton's Next Steps Four - Socks and Slippers and highly recommend it. I modified the pattern a touch - shorter cuff (20 rows), smaller needles (size 0) and shortened the body of the foot for the ladies 7/8 to 6". I also decreased to 12 stitches and then ran the tail through the live stitches to close the toe. The only way I could be happier is if it didn't take me so long to knit them.
I even took a picture, because all words and no graphics make a boring blog:
I've had them on all day and find them very comfortable. They haven't stretched out like my last pair, either. It will likely be awhile before I attempt my next pair (just because knitting socks on size 0 needles takes me a really long time!), but the experience wasn't so bad to put me off them forever. Maybe I'll use a heavier yarn so I can knit on size 2s - that should make it go a little faster. We'll see...
I even took a picture, because all words and no graphics make a boring blog:
I've had them on all day and find them very comfortable. They haven't stretched out like my last pair, either. It will likely be awhile before I attempt my next pair (just because knitting socks on size 0 needles takes me a really long time!), but the experience wasn't so bad to put me off them forever. Maybe I'll use a heavier yarn so I can knit on size 2s - that should make it go a little faster. We'll see...
Wednesday, January 01, 2014
2014 - resewlutions
How is it possible another year has gone by? There was a lot of crafting in 2013 (along with work and some personal stuff that took most of my focus), and I predict 2014 will be filled with more of the same. I wanted to talk about some of the things I have in mind, not only to keep you informed, but also as a way to keep myself focused and accountable.
Here goes...
I've been sewing since I was 10 and learned to knit at 14 (though I didn't fall in love with it until later). I also have a tendency to start a lot of projects and just let them sit and pile up. Multiply that by a few years and well, I have a lot of UFOs in bags and boxes. So, my goal this year is to do 52 projects in 52 weeks. That can be anything from finishing up some of these UFOs to starting something new (I can do a simple skirt in just a few hours, a Tova top in under five hours, so this is not an unattainable goal). I also give myself permission to completely screw this up and not finish this lofty goal (boring for you, less pressure for me).
The 52 projects will include any type of crafting including (but not limited to) cross stitch, needlepoint, quilting, sewing, knitting and crochet.
Where applicable, I will also be including patterns and tutorials so you can join me on this journey (I did mention I had a few things in mind, right?).
So, jump in, clear a space on your work table, pull out your knitting needles, crochet hooks and sewing machine and settle in for some crafting fun. Even if you don't craft, I hope you at least enjoy my musings on my makings in 2014.
Here goes...
I've been sewing since I was 10 and learned to knit at 14 (though I didn't fall in love with it until later). I also have a tendency to start a lot of projects and just let them sit and pile up. Multiply that by a few years and well, I have a lot of UFOs in bags and boxes. So, my goal this year is to do 52 projects in 52 weeks. That can be anything from finishing up some of these UFOs to starting something new (I can do a simple skirt in just a few hours, a Tova top in under five hours, so this is not an unattainable goal). I also give myself permission to completely screw this up and not finish this lofty goal (boring for you, less pressure for me).
The 52 projects will include any type of crafting including (but not limited to) cross stitch, needlepoint, quilting, sewing, knitting and crochet.
Where applicable, I will also be including patterns and tutorials so you can join me on this journey (I did mention I had a few things in mind, right?).
So, jump in, clear a space on your work table, pull out your knitting needles, crochet hooks and sewing machine and settle in for some crafting fun. Even if you don't craft, I hope you at least enjoy my musings on my makings in 2014.
Tuesday, January 01, 2013
Why Sew?
These days, it is no longer necessary to sew in order to fill your wardrobe with clothing. The options are endless: on the low end you have Walmart, Target, etc.; in the middle you have Gap, Banana Republic, J. Crew, Madewell, etc.; while the top end is filled with designer labels such as Chanel, Louis Vuitton, Prada and so on.
The pros are: there are easily available basics in a range of price levels, the cons are: everyone looks like everyone else (boring!). If you're looking for individuality, you can hit thrift stores or try out independent designers, but you may not have the patience for thrifting nor the funds for indie labels.
I believe this is where home sewing fills a niche in today's society.
Do you love vintage clothes, but hate the smell or lack of availability in your size? Pattern companies have re-issued vintage patterns in a variety of sizes and styles (this is the easiest route). You can also search out the original patterns on sites such as etsy or ebay if you're a more standard size or want authenticity in your creations.
Want to create a look that is truly yours? Indie designers such as Wiksten and Megan Nielsen are now releasing patterns of their designs that you can purchase in either a hard copy or digital download (instant gratification!).
Have champagne taste on a ramen budget? The big 4 pattern companies (Vogue, McCall, Butterick and Simplicity) collaborate with designers on a regular basis giving you more options than ever before.
Ultimately, you are limited by your own imagination when it comes to creating pieces for your wardrobe. In fact, you could take it even further and challenge yourself to create your entire wardrobe.
If you've never sewn before, I highly recommend taking a class or finding a friend or relative who knows how to teach you. If that is not an option, there are many how-to books out there, and youtube.com has some great tutorials. The most important thing you need to learn when first learning to sew is how to sew in a straight line. Once you can do that, everything else will follow.
No matter where you go on your DIY journey, there is nothing more satisfying than saying, "I made this!"
The pros are: there are easily available basics in a range of price levels, the cons are: everyone looks like everyone else (boring!). If you're looking for individuality, you can hit thrift stores or try out independent designers, but you may not have the patience for thrifting nor the funds for indie labels.
I believe this is where home sewing fills a niche in today's society.
Do you love vintage clothes, but hate the smell or lack of availability in your size? Pattern companies have re-issued vintage patterns in a variety of sizes and styles (this is the easiest route). You can also search out the original patterns on sites such as etsy or ebay if you're a more standard size or want authenticity in your creations.
Want to create a look that is truly yours? Indie designers such as Wiksten and Megan Nielsen are now releasing patterns of their designs that you can purchase in either a hard copy or digital download (instant gratification!).
Have champagne taste on a ramen budget? The big 4 pattern companies (Vogue, McCall, Butterick and Simplicity) collaborate with designers on a regular basis giving you more options than ever before.
Ultimately, you are limited by your own imagination when it comes to creating pieces for your wardrobe. In fact, you could take it even further and challenge yourself to create your entire wardrobe.
If you've never sewn before, I highly recommend taking a class or finding a friend or relative who knows how to teach you. If that is not an option, there are many how-to books out there, and youtube.com has some great tutorials. The most important thing you need to learn when first learning to sew is how to sew in a straight line. Once you can do that, everything else will follow.
No matter where you go on your DIY journey, there is nothing more satisfying than saying, "I made this!"
Saturday, June 16, 2012
Obladee Oblada Life Goes On
Sometimes, we make changes by choice and other times they are thrust upon us. This last year has been a bit of both for me. The biggest changes were leaving my job of 10 years for an opportunity to work closer to home and the other was losing one of my cats, Gabbana.
The job change took about a year to make happen, and while I try to keep my business out of my blog, it was a necessary move and one that has had some interesting and unexpected side-effects. The biggest difference is I have more time at home for crafting and friends (well, most of the time - I'm in the middle of a huge project, so my personal time is not my own - in fact I am monitoring the work email as I type). It's definitely been nice to be able to see friends after work and not be so exhausted on the weekends that I just cloister myself.
The loss of Gabbana has been really hard for me. She was a tortoise-shell cat, and skittish by nature, but would come to me when she wanted some love. She usually sat at my feet while I sewed or on top of the floor cushions when I was at the computer. She was always where I could see her, and sometimes, I feel like I still do out of the corner of my eye. She's the first pet that I've had from kittenhood until death. I still feel funny when people ask me how many cats I have, "I had two but recently lost one," sounds like I am fishing for sympathy, which I am not. I just still want to be able to honor her and how much I adored having her around. There are not enough words to say how much I enjoyed having her as my companion of nearly 15 years, and how much I miss her and her purr on a daily basis. I know I am not the only one missing her, since I have been watching her sister, Dolce, hiding where Gabbana hid when she got sick or when she didn't want to be around people. It's only the last day or so that Dolce has seemed more like herself again (i.e. - waiting for me at the door and not immediately running away when she sees me). Together the two of them got me through some rough times, and I am forever grateful to have had Gabbana in my life.
Sunday, September 04, 2011
Oh, Hello There
I know, I know, I am among the world's worst bloggers. It doesn't mean I haven't been up to things (I have), but sometimes, I feel selfish or lazy and the end result is, I don't share.
The biggest change was an accidental weight loss of about 30 lbs. I say accidental, because while certainly welcome, it was the end result of finding out I'm allergic to a lot of things I was eating on a regular basis. I ended up cutting out about 1/3 of the things I was eating on a regular basis and before I knew it, I'd lost 10 lbs, then 20 and finally 30. I've been at this current weight about 5 or 6 months, so I think I've found where my body wants to be with all the changes I was forced to make.
If you're wondering how you can apply the changes I made to your own life (because I've had friends tell me they wish they were allergic to food), I will tell you my secrets.
I am allergic to soy, which is surprisingly in EVERYTHING. Seriously. Go to your cupboard and check out the canned and pre-packaged goods, if you don't believe me. I'll wait for you... Now that you've seen it, you will understand the necessity of the first change I made: No more snacking. This meant cutting back on chocolate bars, too (since soy is used as the emulsifier in the majority of commercially available chocolate bars - it's cheaper than the alternatives), so in effect the no snacking rule also meant cutting back on my sugar intake.
The other major change was potatoes (I'm allergic to night shades - tomato, red pepper, white potato and eggplant), which I LOVED eating as french fries. So, this change meant cutting back on fried foods.
Now, that said, I can still eat certain foods I'm allergic too IF they are prepared in a certain way - basically, they need to be cooked at 200 degrees or above for a minimum of 20 minutes. This kills the allergens and my body does not recognize that a baked potato is bad, but since fries are cooked too briefly, they are in the no go column. Confused? Yeah, me too. I just know it works, but as a precaution, I carry Zyrtec in case I feel the familiar tingle. I haven't had a reaction since January, so I must be doing something right.
There's more, but the above will give you the gist of the changes I've made. Initially, it was difficult, but the fear of having a reaction made it easier (very easy to avoid fries when you compare it to the thought of itching and swelling from them).
The end result is I have a whole new body to sew for, and honestly, I am still not seeing it in the mirror. I keep buying and making things for the old one, and I am working to change that. I finally went and tried clothes on and found out what size I am (2 sizes down from where I was - I am still shocked by this, again my friends hate when I say this, but I think it is important to note we can all have body image issues no matter if we gain or lose weight).
So that brings us to the more crafty, less wordy part of this entry! I have decided to take part in the Coletterie fall palette challenge, if for no other reason to make new clothes to go with my new body! I picked out my colors, which I am sharing below. They go with a lot of things I already have, and I think the grey will be a nice neutral (as I think black is too harsh for me now). I've actually already got a lot of these colors in my fabric and yarn stash, and just need to finalize what to make before posting that.
I hope my post about food allergies is useful for others. I was really lucky to have had other friends who had gone through something similar and was able to discuss it with them, which made it a less stressful experience. If anyone needs recommendations for companies that do not use soy in their product, please let me know - I've found a few I can recommend.
The biggest change was an accidental weight loss of about 30 lbs. I say accidental, because while certainly welcome, it was the end result of finding out I'm allergic to a lot of things I was eating on a regular basis. I ended up cutting out about 1/3 of the things I was eating on a regular basis and before I knew it, I'd lost 10 lbs, then 20 and finally 30. I've been at this current weight about 5 or 6 months, so I think I've found where my body wants to be with all the changes I was forced to make.
If you're wondering how you can apply the changes I made to your own life (because I've had friends tell me they wish they were allergic to food), I will tell you my secrets.
I am allergic to soy, which is surprisingly in EVERYTHING. Seriously. Go to your cupboard and check out the canned and pre-packaged goods, if you don't believe me. I'll wait for you... Now that you've seen it, you will understand the necessity of the first change I made: No more snacking. This meant cutting back on chocolate bars, too (since soy is used as the emulsifier in the majority of commercially available chocolate bars - it's cheaper than the alternatives), so in effect the no snacking rule also meant cutting back on my sugar intake.
The other major change was potatoes (I'm allergic to night shades - tomato, red pepper, white potato and eggplant), which I LOVED eating as french fries. So, this change meant cutting back on fried foods.
Now, that said, I can still eat certain foods I'm allergic too IF they are prepared in a certain way - basically, they need to be cooked at 200 degrees or above for a minimum of 20 minutes. This kills the allergens and my body does not recognize that a baked potato is bad, but since fries are cooked too briefly, they are in the no go column. Confused? Yeah, me too. I just know it works, but as a precaution, I carry Zyrtec in case I feel the familiar tingle. I haven't had a reaction since January, so I must be doing something right.
There's more, but the above will give you the gist of the changes I've made. Initially, it was difficult, but the fear of having a reaction made it easier (very easy to avoid fries when you compare it to the thought of itching and swelling from them).
The end result is I have a whole new body to sew for, and honestly, I am still not seeing it in the mirror. I keep buying and making things for the old one, and I am working to change that. I finally went and tried clothes on and found out what size I am (2 sizes down from where I was - I am still shocked by this, again my friends hate when I say this, but I think it is important to note we can all have body image issues no matter if we gain or lose weight).
So that brings us to the more crafty, less wordy part of this entry! I have decided to take part in the Coletterie fall palette challenge, if for no other reason to make new clothes to go with my new body! I picked out my colors, which I am sharing below. They go with a lot of things I already have, and I think the grey will be a nice neutral (as I think black is too harsh for me now). I've actually already got a lot of these colors in my fabric and yarn stash, and just need to finalize what to make before posting that.
I hope my post about food allergies is useful for others. I was really lucky to have had other friends who had gone through something similar and was able to discuss it with them, which made it a less stressful experience. If anyone needs recommendations for companies that do not use soy in their product, please let me know - I've found a few I can recommend.
Saturday, January 08, 2011
New From Old
I've sewn for a long time, and back when I was a teenager (read: cash-strapped), I would often remake one item of clothing into another. This was especially important if I loved the fabric, but hated the rest of it. The item that stands out was a pair of cropped pants that I made from the skirt of a jumper that was too tight in the bodice. The bodice itself was later remade into a hat. There's something really satisfying about taking something you love and making it into something you love even more.
The leather tote I made the other day is one case in point. I loved the skirt, but never wore it, and now that it's a bag, I've used it everyday this week.
Along the same lines as the leather tote, I just finished a suede bag that was made from another skirt. That skirt I found for $7 at the magical thrift store with the intention of turning it into something else.
Here's the before:

And now the after:

The pattern I used can be found in this mook:

And here's a picture of the original (not that you can even see it here...):

I have a small collection of Japanese mooks, but this is the first thing I've made from any of them. If you have any experience working with Burdastyle (formerly World of Burda) magazine patterns, you should have no trouble figuring out how to work from this. This particular pattern needed to be drafted by hand (the mook gives you diagrams and measurements), and then you can follow the pictures on how to put it together. I've made several of these bags from other material (mostly linen and corduroy) and they turn out awesome! Very roomy, and great for carrying knitting projects around. The bag is also lined, but for the suede version, I wanted it to be a little unconstructed, so no lining was added.
The leather tote I made the other day is one case in point. I loved the skirt, but never wore it, and now that it's a bag, I've used it everyday this week.
Along the same lines as the leather tote, I just finished a suede bag that was made from another skirt. That skirt I found for $7 at the magical thrift store with the intention of turning it into something else.
Here's the before:
And now the after:
The pattern I used can be found in this mook:
And here's a picture of the original (not that you can even see it here...):
I have a small collection of Japanese mooks, but this is the first thing I've made from any of them. If you have any experience working with Burdastyle (formerly World of Burda) magazine patterns, you should have no trouble figuring out how to work from this. This particular pattern needed to be drafted by hand (the mook gives you diagrams and measurements), and then you can follow the pictures on how to put it together. I've made several of these bags from other material (mostly linen and corduroy) and they turn out awesome! Very roomy, and great for carrying knitting projects around. The bag is also lined, but for the suede version, I wanted it to be a little unconstructed, so no lining was added.
Tuesday, January 04, 2011
Risk Taking
Sometimes, I am my own worst enemy when it comes to taking risks. Playing it safe has gotten me far, but not far enough. This is especially true in my crafting. I am full of wild ideas, and then don't allow myself to follow through. The funny thing is, when I have allowed myself to take risks, I end up surprising myself and the idea comes out even better than I imagined. So, I have dubbed 2011 the year of follow through.
I went thrifting with my friend, Nico, a week ago and when we got to Playclothes, we started talking about this very thing - risk taking. I told her that I had a leather skirt that I never wear and have been intending to turn into a tote bag forever, but was afraid of ruining it. There is something about being a lover of all things vintage that makes you want to care for the things in your possession and the leather skirt was no different. Another friend gave it to me about 10 years ago, and in my own way, I felt it would hurt that memory if I messed up the transition from skirt to bag.
Well, with that conversation fresh in my mind, I thought, "What is the worst that happens? I could ruin it, sure, but better to try then have the skirt hanging around being useless." So, I measured my favorite tote bags to get an idea of the size I wanted, grabbed scissors, a measuring tape and the skirt and got busy.
Here's the before:

And here's the after:

I'm really pleased with how it turned out, and have a brand new appreciation for the bloggers I read who work with leather. That is no easy task!
In the end, I got the bag I wanted - very simple shape to show off the seaming from the skirt, and I left it unlined for a modern look.
I went thrifting with my friend, Nico, a week ago and when we got to Playclothes, we started talking about this very thing - risk taking. I told her that I had a leather skirt that I never wear and have been intending to turn into a tote bag forever, but was afraid of ruining it. There is something about being a lover of all things vintage that makes you want to care for the things in your possession and the leather skirt was no different. Another friend gave it to me about 10 years ago, and in my own way, I felt it would hurt that memory if I messed up the transition from skirt to bag.
Well, with that conversation fresh in my mind, I thought, "What is the worst that happens? I could ruin it, sure, but better to try then have the skirt hanging around being useless." So, I measured my favorite tote bags to get an idea of the size I wanted, grabbed scissors, a measuring tape and the skirt and got busy.
Here's the before:
And here's the after:
I'm really pleased with how it turned out, and have a brand new appreciation for the bloggers I read who work with leather. That is no easy task!
In the end, I got the bag I wanted - very simple shape to show off the seaming from the skirt, and I left it unlined for a modern look.
Saturday, January 01, 2011
Happy New Year!
Here we are at the beginning of another new year, a time of renewal, both on the calendar and in our souls. NxtDrGuy and I changed up our usual celebrations - instead of Black Angus, we went to Gulfstream. The food, as always, was superb, but since we were stuck in a corner, at some point, our waiter just kind of disappeared. We literally could have walked out without paying and I don't think anyone would have been the wiser (we are not the sort of people who dine and ditch, but given the lack of attention, it would definitely have been possible). Good thing we had no where to go except home for some Doctor Who and Dick Clark's Rockin' New Year's Eve, or we would have been a lot more steamed about it.
Eh, but enough with the complaining!
I have been on a paring down kick lately, and things I thought I couldn't let go of, have been let go of. My old bedside table resides with a friend, and clothes and shoes are slowly being let go of. I have a friend who takes my fabric scraps for his business, and yarn has also been parted with. It's a way for me to make some order out of the chaos, and believe me, there is a lot of chaos in my life right now. Nothing that is interesting to anyone other than myself and a few close friends, but I find letting go of things by finding them good homes is helping me to cope.
Speaking of order from chaos, I am updating/repairing/re-making a few cherished items, and wanted to share the latest success story. I bought a red cardigan from Anthropologie a few years back and then promptly dribbled salad dressing on it (grrrrr). In order to cover it up, I was inspired by another Anthropologie cardigan with trim. Here are the results:
Here's the sweater:

And a close up of the spot (out, out damn spot!):

Here's the inspiration - such gorgeous trim to play with!

And here is the outcome (well, just pinned on - need to find the time to stitch it down, plus, still not sold on the crochet flower...):

Now for the close up:

Overall, it took about an hour or so to do all of the trims while watching TV/surfing the web. I even crocheted the squiggly bit and the flower (which I'm aware is not the best crocheted flower ever, but it's the first one I've ever done and I'm kind of partial to it's sorry state).
The best thing I got out of it is more life from a favorite sweater and a little practice with crochet (a craft I now want to try more of...).
Eh, but enough with the complaining!
I have been on a paring down kick lately, and things I thought I couldn't let go of, have been let go of. My old bedside table resides with a friend, and clothes and shoes are slowly being let go of. I have a friend who takes my fabric scraps for his business, and yarn has also been parted with. It's a way for me to make some order out of the chaos, and believe me, there is a lot of chaos in my life right now. Nothing that is interesting to anyone other than myself and a few close friends, but I find letting go of things by finding them good homes is helping me to cope.
Speaking of order from chaos, I am updating/repairing/re-making a few cherished items, and wanted to share the latest success story. I bought a red cardigan from Anthropologie a few years back and then promptly dribbled salad dressing on it (grrrrr). In order to cover it up, I was inspired by another Anthropologie cardigan with trim. Here are the results:
Here's the sweater:
And a close up of the spot (out, out damn spot!):
Here's the inspiration - such gorgeous trim to play with!
And here is the outcome (well, just pinned on - need to find the time to stitch it down, plus, still not sold on the crochet flower...):
Now for the close up:
Overall, it took about an hour or so to do all of the trims while watching TV/surfing the web. I even crocheted the squiggly bit and the flower (which I'm aware is not the best crocheted flower ever, but it's the first one I've ever done and I'm kind of partial to it's sorry state).
The best thing I got out of it is more life from a favorite sweater and a little practice with crochet (a craft I now want to try more of...).
Sunday, October 31, 2010
Anthro Rennie Tee Shirt
Like many crafting bloggers, I find Anthropologie's website to be very inspiring. Earlier this week, I fell in love with the Rennie Tee, and although the original was made from knit fabric, I thought I would try my hand at a woven version. I made it in about 4 hours this morning, and I really love the results!
Here's the original:

The William Morris-style fabric with the contrasting trim really works with simple design of the t-shirt.
I chose Vogue 7457 as my basis for the design, and some cotton satin I had in my stash from Mom:

I chose View C, but made a few changes. First, I really wanted the length of View B, but since I had decided to use the wrong side of the fabric as my contrast, I removed the hem length (1 1/4") from View C, and lowered the slits by 2". I also did the same for the sleeves (though this had more to do with the fact the fabric I was using was only 36" wide, so I didn't have enough to make them longer).
Before sewing the shoulders and side seams together, I hemmed the sleeves by pressing 1/4" to the outside and then another 1" after that. I then topstitched the contrast hems. For the lower bands, I again pressed under 1/4" and then folded the hem to the outside to where my new slits ended (about 3"). I then folded this back to the inside, stitched the sides of the contrast together (in order to encase the contrast portion), trimmed the seams I just stitched, clipped the side seams to the notch, and turned the contrast wrong side out again. I pinned the contrast down and topstitched it down. Once I did that to the front and back pieces, I was able to sew the side seams together and the top was almost done!
Lastly, I decided I wanted a contrast band at the neck edge, so I cut self bias tape that was 1 1/4" in width and about 24" in length (I measured the neck area and suggest you do the same. It doesn't have to be too perfect since bias will stretch). I used the bias tape to encase the neck edge. First, I pinned it to the wrong side and adjusted to fit, and the sewed the raw edges together (joining the bias ends in a circle) at one of the shoulder seams. Then, I stitched it the the wrong side of the neck edge before pressing it to the right side, (pressing raw edge under by 1/4"), and finally stitching the bias tape in place. And that was it! Super simple and very cute. It will make a great top by itself in the Summer, but I know me, and it will also get worn throughout the fall and winter over a long sleeve t-shirt, with either pants or a skirt.
Here's my finished version:

And a close up of the contrasting trim:
Here's the original:
The William Morris-style fabric with the contrasting trim really works with simple design of the t-shirt.
I chose Vogue 7457 as my basis for the design, and some cotton satin I had in my stash from Mom:
I chose View C, but made a few changes. First, I really wanted the length of View B, but since I had decided to use the wrong side of the fabric as my contrast, I removed the hem length (1 1/4") from View C, and lowered the slits by 2". I also did the same for the sleeves (though this had more to do with the fact the fabric I was using was only 36" wide, so I didn't have enough to make them longer).
Before sewing the shoulders and side seams together, I hemmed the sleeves by pressing 1/4" to the outside and then another 1" after that. I then topstitched the contrast hems. For the lower bands, I again pressed under 1/4" and then folded the hem to the outside to where my new slits ended (about 3"). I then folded this back to the inside, stitched the sides of the contrast together (in order to encase the contrast portion), trimmed the seams I just stitched, clipped the side seams to the notch, and turned the contrast wrong side out again. I pinned the contrast down and topstitched it down. Once I did that to the front and back pieces, I was able to sew the side seams together and the top was almost done!
Lastly, I decided I wanted a contrast band at the neck edge, so I cut self bias tape that was 1 1/4" in width and about 24" in length (I measured the neck area and suggest you do the same. It doesn't have to be too perfect since bias will stretch). I used the bias tape to encase the neck edge. First, I pinned it to the wrong side and adjusted to fit, and the sewed the raw edges together (joining the bias ends in a circle) at one of the shoulder seams. Then, I stitched it the the wrong side of the neck edge before pressing it to the right side, (pressing raw edge under by 1/4"), and finally stitching the bias tape in place. And that was it! Super simple and very cute. It will make a great top by itself in the Summer, but I know me, and it will also get worn throughout the fall and winter over a long sleeve t-shirt, with either pants or a skirt.
Here's my finished version:
And a close up of the contrasting trim:
Tuesday, April 13, 2010
Taking the Plunge
While Wardrobe Refashion undergoes it's changes, I've decided to do my own personal challenge. In an effort to knock down my massive stash (fabric and yarn) and cut down on spending, I hereby publicly declare that for the next 4 months, I will not buy new clothing. That means this pledge will be done on my birthday, so if I feel the need to treat myself, it will be well-deserved and much-desired!
Admittedly, the hardest habit to kick will be my shoe addiction. I may slip up, and promise to report back on my progress.
Here goes nothing!
Admittedly, the hardest habit to kick will be my shoe addiction. I may slip up, and promise to report back on my progress.
Here goes nothing!
Sunday, November 29, 2009
Stella!!!!!!
I came across the Stella McCartney collection for Gap Kids about a week or so ago online. The clothes are a little pricey for a kids collection (IMO), but very well priced for Stella. If you're not familiar with her, besides being the daughter of Paul McCartney (aka one of the Beatles), she also brought the design house Chloe back from the brink in the last decade. She really has her finger on the fashion button in terms of being both fashion-forward and wearable.
Anyway, I was at Fashion Square with my little sister today taking a break from the rest of the fam, and we poked our head in to Gap Kids to check it out. It was a wee bit crowded in there, so she got on line while I perused the collection. I loved the cashmere pullover with the intarsia leopard, but it was far from practical in real-life (and for something I wouldn't wear often, $98 is a little expensive).

I did, however, find a grey asymmetrical cardigan in kids XXL that fit me just right. For the price, $58, I couldn't go wrong, and I will even go so far as to say this is my new favorite sweater! I fully expect to wear this until it falls apart. The cotton/cashmere blend also make it feel really nice. Did I mention I'm excited about this? I really am, like, stupidly so! And, I can forgive the XXL tag by reminding myself that it's a KIDS XXL, not women's! Muahahahaha
Anyway, I was at Fashion Square with my little sister today taking a break from the rest of the fam, and we poked our head in to Gap Kids to check it out. It was a wee bit crowded in there, so she got on line while I perused the collection. I loved the cashmere pullover with the intarsia leopard, but it was far from practical in real-life (and for something I wouldn't wear often, $98 is a little expensive).

I did, however, find a grey asymmetrical cardigan in kids XXL that fit me just right. For the price, $58, I couldn't go wrong, and I will even go so far as to say this is my new favorite sweater! I fully expect to wear this until it falls apart. The cotton/cashmere blend also make it feel really nice. Did I mention I'm excited about this? I really am, like, stupidly so! And, I can forgive the XXL tag by reminding myself that it's a KIDS XXL, not women's! Muahahahaha
Thursday, November 05, 2009
Day 5 - Tune in Thursday
I'm not a huge fan of episodic TV - miss a week and I'm Lost (no pun intended). That said, I do occasionally fall for shows - HARD. Usually, the ones I like get canceled - Square Pegs, anyone? What about TV 101? (Yes, there are more recent examples, I'm just drawing a blank). I adore most of the sci-fi on BBC America (Doctor Who, Torchwood, Life on Mars, Ashes to Ashes, Being Human, Primeval), but not so crazy about the period pieces (Robin Hood, for example - too soap opera-y and they killed Marian, wha???). I despise reality TV shows, to the point that I feel they suck the life out of you and are hastening the demise of Western Civilization (merely MHO, of course! Others LOVE them, but I'll just continue staging my one woman boycott to make myself feel better).
So, the reason I'm posting is to say that I really like Flash Forward and don't want it to go away! The pilot was intriguing, and there was enough there to make me want to see where they're going to go with the idea. Oh, and Joseph Fiennes is cute, which never hurts ;-)
The only other show I'm interested in catching is V, though I missed it Tuesday when I went to Disney Hall. Still, I'll catch up over the weekend on abc.com and see how I feel. I liked the original version way back in the day, and the kid who played the lead's son sat behind me in French class that year, which made it that much cooler.
So, the reason I'm posting is to say that I really like Flash Forward and don't want it to go away! The pilot was intriguing, and there was enough there to make me want to see where they're going to go with the idea. Oh, and Joseph Fiennes is cute, which never hurts ;-)
The only other show I'm interested in catching is V, though I missed it Tuesday when I went to Disney Hall. Still, I'll catch up over the weekend on abc.com and see how I feel. I liked the original version way back in the day, and the kid who played the lead's son sat behind me in French class that year, which made it that much cooler.
Wednesday, November 04, 2009
Day 4 - for reals
Ah, Wednesday, that un-special, middle of the week, hump day. Half way through the week already (thank goodness!). I really ought to be sewing, but am procrastinating while watching TV. I wish I could craft as fast as I come up with ideas, but have to remind myself: It's the process, not the finished product that makes it enjoyable. That said, I've finished quite a few knitted projects over the last two weeks that just need blocking/sewing together. I'll get it all done eventually...
Anyway, not feeling particularly verbose this evening, so will sign off for now...
Subscribe to:
Posts (Atom)